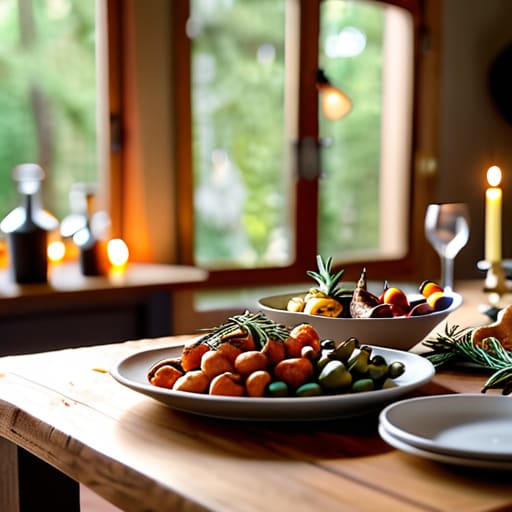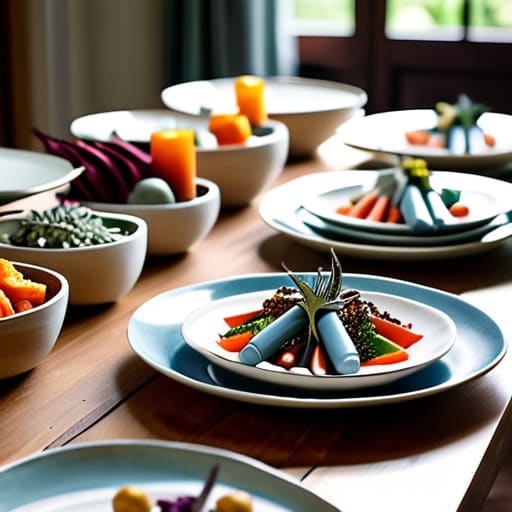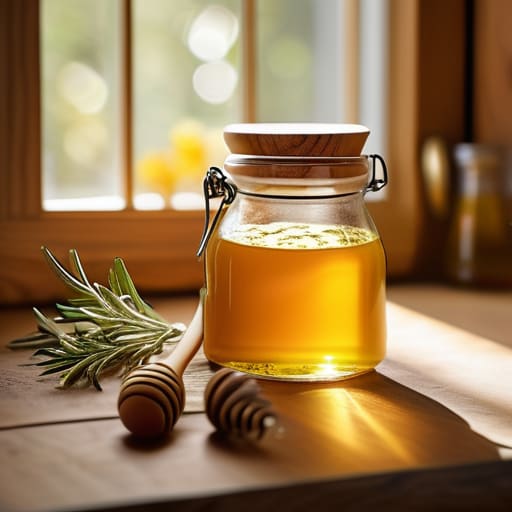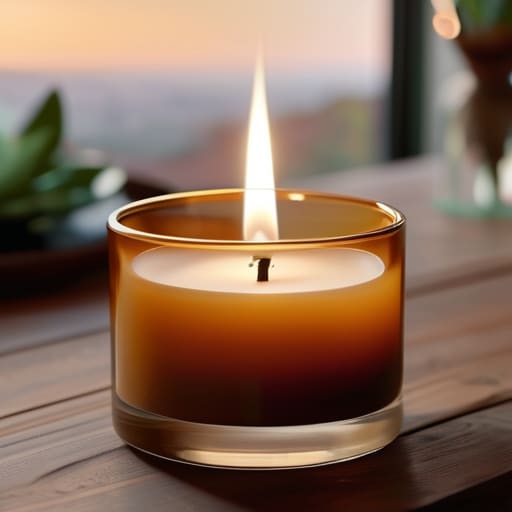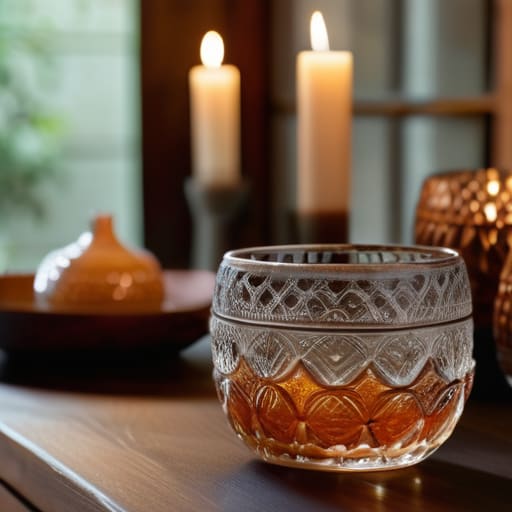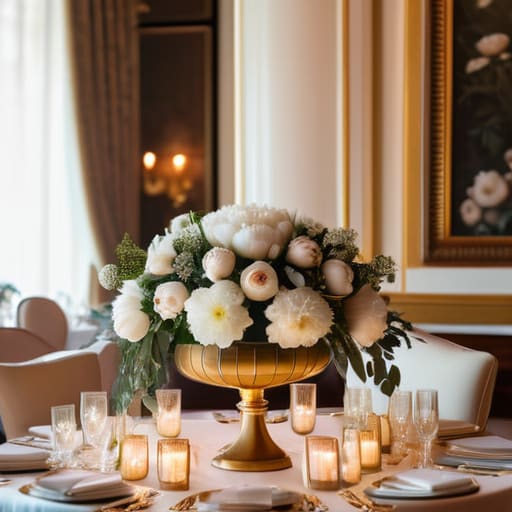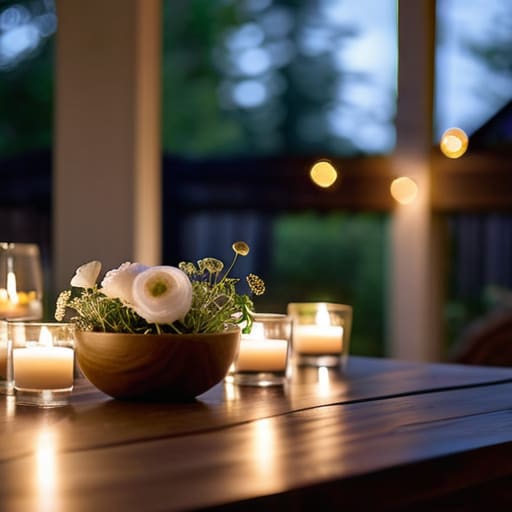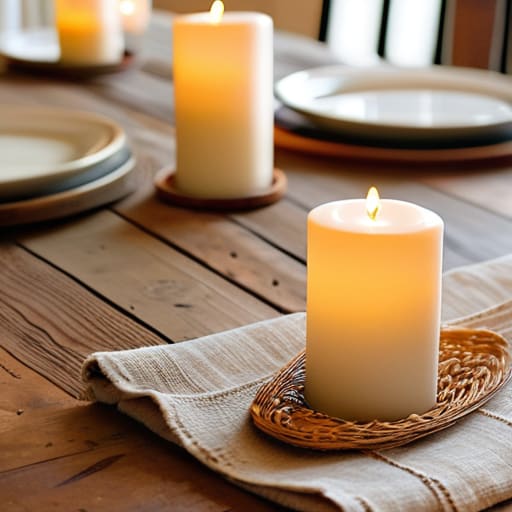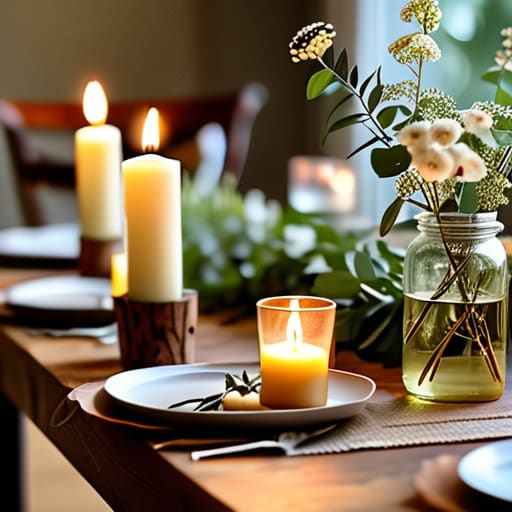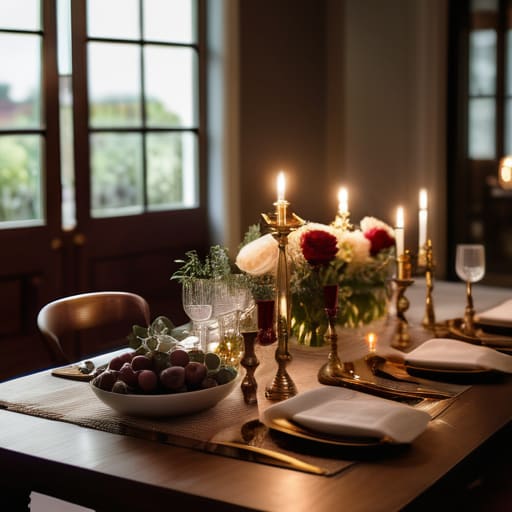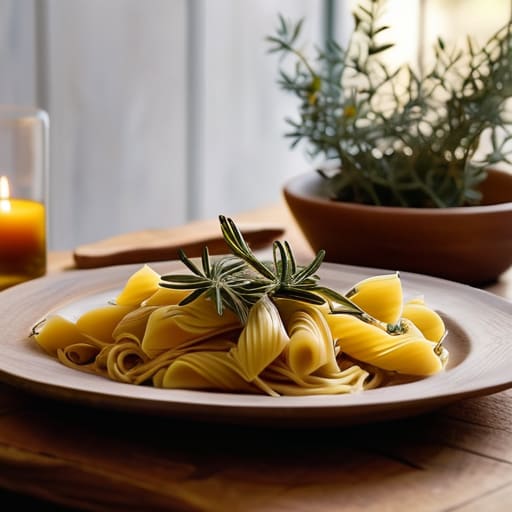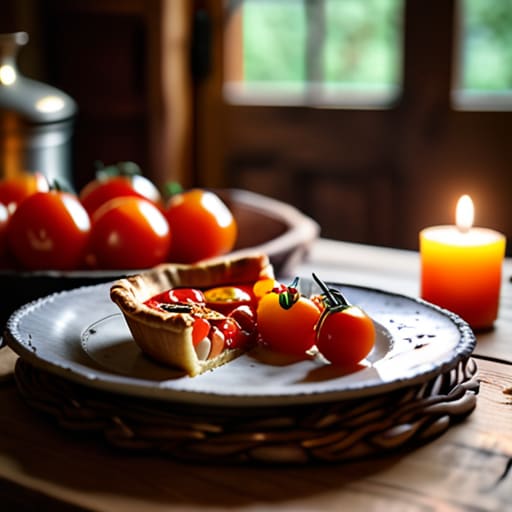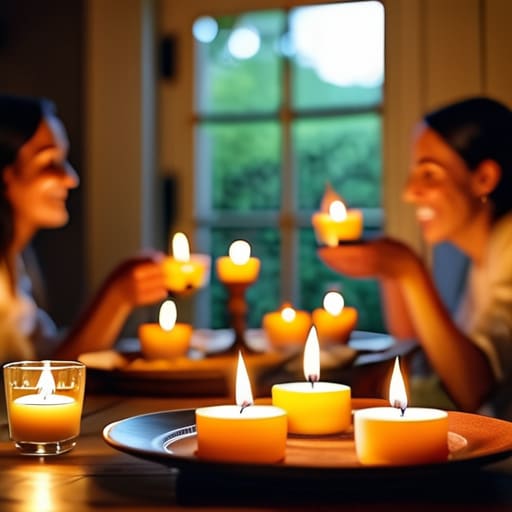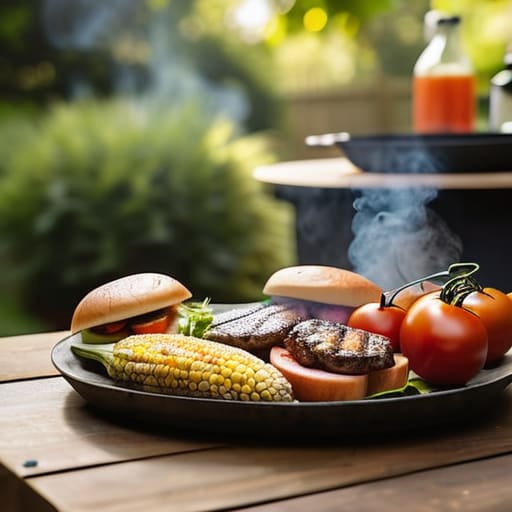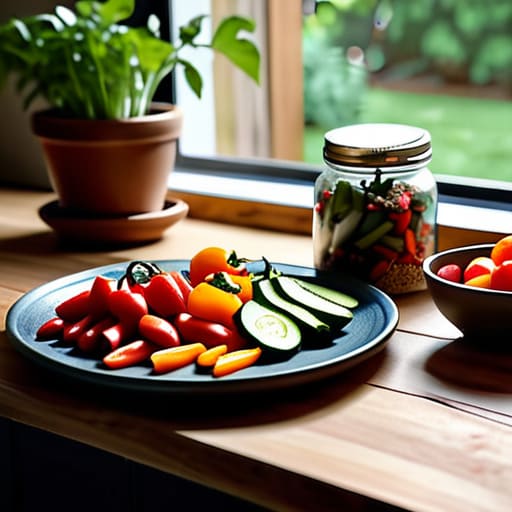
Elegant traditional tea party decor setup.

Decorating for a Traditional Tea Party

I was elbow-deep in a mountain of overpriced, plastic-wrapped floral arrangements last week for a client, and honestly? I just wanted to walk out. There is this massive, exhausting myth that “tea party decor” has to mean spending a small fortune on pristine, matching porcelain sets and those stiff, formal tablecloths that make everyone afraid to even touch their scones. It’s so performative. We’ve turned what should be a cozy afternoon of catching up into this high-stress design project where the goal is to look perfect rather than to actually feel comfortable.

I’m not here to sell you on a Pinterest-perfect fantasy that leaves your bank account empty and your guests feeling awkward. Instead, I want to show you how to pull together effortless, soulful spaces using what you already have (or what you can find for a few euros at a thrift shop). We’re going to focus on mismatched charm, warm lighting, and real connection. I’ll share my favorite low-stress ways to style your table so you can spend less time obsessing over the placement of a napkin and more time actually enjoying the tea.

Table of Contents

Embracing English Garden Party Aesthetics for Cozy Vibes

Embracing English Garden Party Aesthetics for Cozy Vibes

If you’re looking to lean into that dreamy, slightly overgrown look, I am a huge fan of embracing english garden party aesthetics without needing a literal botanical garden to pull it off. You don’t need a manicured lawn; you just need a little bit of texture. I love using mismatched floral linens and even a few sprigs of eucalyptus or dried lavender scattered across the table. It’s all about that effortless, lived-in feel that makes guests feel like they can actually relax rather than worrying about spilling tea on a pristine white tablecloth.

For the tabletop, I usually steer clear of anything too symmetrical. Instead, I lean into shabby chic table settings by mixing and matching different patterns. If you have some old, chipped porcelain or some tarnished silver spoons from a thrift shop, use them! Those little imperfections add so much soul to the spread. I find that a soft pastel color palette for tea parties—think dusty rose, sage green, or a pale buttercream—really helps tie those different textures together. It creates this soft, glowing atmosphere that makes everyone feel instantly calm and welcomed.

Shabby Chic Table Settings That Feel Like Home

Shabby Chic Table Settings That Feel Like Home

If you’re anything like me, you probably have a drawer full of mismatched plates or a collection of chipped saucers from your local thrift store. Don’t hide them! Those little imperfections are exactly what make shabby chic table settings feel so soulful and lived-in. Instead of trying to find a matching set that looks like it came straight out of a department store catalog, lean into the chaos. I love layering different patterns—maybe a floral linen runner paired with some slightly worn lace napkins. It creates this soft, textured look that feels much more inviting than a stiff, formal setup.

When it comes to the actual layout, don’t stress too much about perfect afternoon tea etiquette and setting rules. Your friends aren’t coming over to be graded on their spoon placement; they’re coming to catch up. I usually stick to a soft pastel color palette for tea parties to keep things feeling airy and light, but I’ll toss in a few mismatched vintage spoons to add some character. If you’re feeling stuck, just grab some old wooden crates or even a few weathered books to create different heights on the table. It keeps the eye moving and makes the whole spread feel effortless.

My Little Secrets for Making the Space Feel Magic

  • Don’t go overboard with the “perfect” matching sets; I actually love using mismatched vintage teacups from my latest thrift haul to give the table some soul and character.
  • Lighting is everything, so skip the harsh overhead lights and scatter some unscented tea lights or fairy lights around to keep the mood soft and relaxing.
  • Use what you have in the kitchen to create greenery—a few sprigs of rosemary or even some wildflowers from your backyard in a simple glass jar look much more intentional than stiff, expensive floral arrangements.
  • Keep the centerpiece low to the table; you want your friends to be able to see each other’s faces without having to lean around a giant vase of roses just to ask how their job is going.
  • I always keep a roll of double-sided tape in my bag for a reason—use it to discreetly secure linen napkins or lightweight decor so nothing shifts mid-party and ruins the cozy flow you’ve worked so hard to create.

My Golden Rules for a Stress-Free Tea Party

Don’t go hunting for a perfect matching set; the charm of a tea party is in the mismatched vintage finds that tell a story.

Prioritize lighting and comfort over perfection—dim the overheads and use candles to keep the mood relaxed and intimate.

Remember that your guests are there for the connection, so keep the decor simple enough that you aren’t stuck in the kitchen all afternoon.

The Heart of the Table

“At the end of the day, your tea party decor shouldn’t feel like a museum exhibit; it should feel like an invitation. If your mismatched saucers and scattered wildflowers make your guests feel like they can kick off their shoes and stay for hours, then you’ve absolutely nailed it.”

Saoirse Mullan

Making It Your Own

Making It Your Own with cozy decor.

At the end of the day, whether you’re leaning into that lush English garden vibe or hunting down the perfect mismatched plates for a shabby chic spread, the goal is the same: creating a space where people actually want to linger. You don’t need to follow a strict rulebook or spend your entire paycheck at a high-end boutique to pull this off. Just remember to focus on the basics—think soft lighting, plenty of comfortable seating, and maybe a few of those vintage finds I’m always obsessing over. If you’ve got the tea flowing and the atmosphere feels warm, you’ve already won the battle.

Please, don’t let the fear of “not being perfect” stop you from hosting that much-needed get-together. Your friends aren’t going to show up and critique your centerpiece placement; they’re going to show up because they want to catch up with you. The most beautiful decor in the world can’t replace the magic of a genuine connection made over a warm cup of Earl Grey. So, grab your double-sided tape, clear off the dining table, and just start creating. I promise, the memories you make will be far more lasting than any perfectly styled table setting could ever be.

Frequently Asked Questions

I love the vintage look, but what should I do if I can't find enough matching sets at the thrift store?

Honestly, that is actually my favorite way to style! Don’t stress about finding perfect matches—it can feel a bit overwhelming and, frankly, a little stiff. Instead, lean into the “mismatched” look. I love grabbing different patterns or colors that share a similar vibe, like all pastel tones or all floral prints. It makes the table feel collected over time rather than bought from a catalog. It’s much more relaxed and inviting.

How can I decorate for a tea party without making my small living room feel cluttered or overwhelming?

When you’re working with a smaller footprint, less is definitely more. I always tell my clients to focus on “vertical” interest rather than spreading everything across the floor. Instead of a massive centerpiece, try a few slim, bud vases with single stems. Keep the snack trays small and tuck them close to the seating. If you keep the surfaces clear and let the lighting do the heavy lifting, the room will feel intentional, not crowded.

Are there any budget-friendly ways to add some greenery or flowers to the table that don't look too "stiff"?

Honestly, don’t feel like you need to buy those massive, expensive florist bundles that look like they’re from a catalog. To keep things feeling relaxed, I love using “foraged” greenery—just grab some interesting branches or even some herbs like rosemary and mint from the grocery store. Tuck them into small, mismatched bud vases or even old jam jars. It looks effortless, smells amazing, and keeps the vibe totally cozy rather than stiff.

Sophisticated cocktail party snacks on platter.

Sophisticated Snack Ideas for Cocktail Parties

I’ve been there more times than I’d like to admit—standing in my kitchen ten minutes before guests arrive, staring at a fridge full of ingredients and feeling completely overwhelmed. We’ve all felt that pressure to host the “perfect” evening, but honestly, the stress of trying to plate tiny, complicated hors d’oeuvres usually just kills the vibe before the first drink is even poured. When it comes to choosing the right cocktail party snacks, I think we often forget that the food should be a supporting character, not the main event. You want things that people can actually eat while holding a glass in one hand, without needing a tiny fork or a nap immediately afterward.

In this post, I’m stripping away the pretension and sharing my personal go-to list of five easy, crowd-pleasing bites. These aren’t your typical, stuffy catering platters; these are the kinds of soulful, simple snacks I rely on to keep the energy high and the conversation flowing. I’ll show you how to pull together a spread that looks effortlessly chic—even if you’re using your favorite thrifted glassware—so you can actually spend your night catching up with your friends instead of hovering over a stove.

Table of Contents

The Ultimate Grazing Board

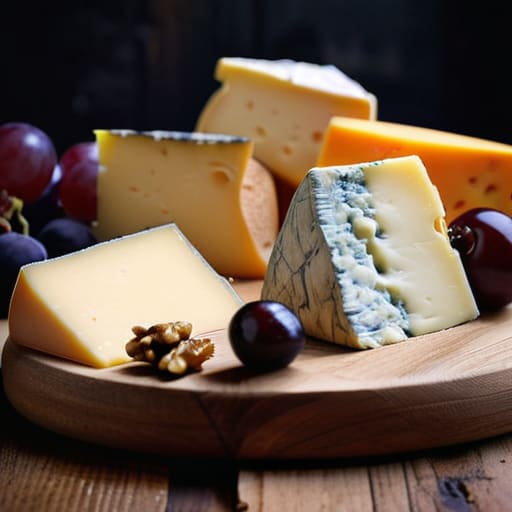
The Ultimate Grazing Board with cheese.

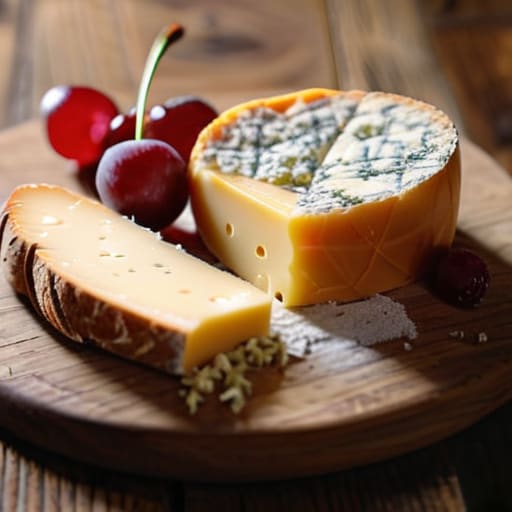
There is nothing I love more than a big, messy cheese board spread across a coffee table. Instead of plating everything perfectly, I like to just pile it on with a mix of sharp cheddars, some creamy brie, and whatever grapes or figs I found at the farmer’s market that morning. It feels much more approachable than a formal platter, and it encourages everyone to lean in and linger around the food.

Warm Crostini with a Twist

Warm Crostini with a Twist and goat cheese.

If you want something that feels a little more intentional but is still incredibly easy, go for toasted crostini. I usually toast up some slices of a crusty baguette and top them with something simple like goat cheese and a dollop of fig jam. It’s that perfect balance of salty and sweet that seems to disappear from the tray within minutes of guests arriving.

Skewered Bites for Easy Eating

Skewered Bites for Easy Eating Caprese Skewers

One of my biggest pet peeves at parties is trying to eat something complicated with a fork and knife while holding a drink. That’s why I’m such a huge fan of anything on a stick! Caprese skewers—just a cherry tomato, a basil leaf, and a tiny mozzarella ball drizzled with balsamic—are my absolute go-to. They are effortlessly chic and require zero silverware.

Elevated Popcorn Bowls

Don’t let the simplicity fool you; a really good bowl of seasoned popcorn can be the star of the show. I love making a big batch and tossing it with something unexpected, like truffle oil and parmesan or even a bit of rosemary and sea salt. It’s the kind of snack that people just naturally gravitate toward while they’re deep in conversation.
Sweet & Salty Nut Mixes

Sometimes you just need something small to nibble on between sips of wine, and a well-seasoned nut mix is the answer. I usually take some plain almonds or cashews and toss them in a pan with a little melted butter, smoked paprika, and a hint of maple syrup. The result is a heavenly combination of flavors that feels much more sophisticated than a bag of salted peanuts.

My Golden Rules for Stress-Free Snacking

Keep it bite-sized so your guests can actually hold a drink and a plate without needing a full table setting or a heavy knife.

Don’t overthink the presentation; a few mismatched vintage platters from a thrift store look way more soulful than a matching set of sterile white dishes.

Prioritize flavors that don’t require you to be stuck in the kitchen all night—prep as much as you can ahead of time so you can actually enjoy the party too.

My Golden Rule for Hosting

“I always tell my clients: if a snack requires a tiny fork and a lot of concentration to eat, it’s going to kill the vibe. Aim for things that can be enjoyed with one hand while the other is holding a drink and a friend’s hand.”

Saoirse Mullan

The Secret Ingredient

At the end of the day, whether you’re serving up those salty, crunchy nuts, a sophisticated cheese board, or just some simple crostini, the goal is the same: you want food that gets out of the way so the fun can happen. You don’t need a mountain of complicated hors d’oeuvres to impress anyone. Just focus on a few reliable, easy-to-grab bites that won’t leave your guests feeling weighed down or stuck with messy hands while they’re trying to hold a drink. If you keep things simple and prioritize flavors that everyone loves, you’ll find that the food becomes a natural part of the evening rather than a stressful centerpiece you’re constantly fussing over.

Please remember that your guests aren’t coming over to critique your culinary skills; they are coming to see you. They want to laugh, catch up, and feel at home in your space. If a tray of olives is all you manage to put out because you were too busy chatting, that is perfectly okay. The most memorable nights aren’t the ones that look like a spread from a magazine, but the ones where the lighting is soft, the drinks are flowing, and the conversation never hits a lull. So, take a deep breath, grab a snack for yourself, and go enjoy your people.

Frequently Asked Questions

How much food should I actually put out so people don't leave hungry, but I'm not stuck in the kitchen all night?

Honestly, the biggest mistake I see is overthinking the math and ending up stuck by the oven. My rule of thumb? Aim for about 6 to 8 pieces per person if it’s just light snacking. If you want people to feel actually full, add one “heavy” item—like a warm slider or a hearty dip. Most importantly, prep everything before the first doorbell rings. You want to be holding a drink, not a spatula!

Are there any easy snack ideas that are safe for guests with common allergies like gluten or nuts?

Oh, I’m so glad you asked! This is exactly what I mean about making people feel welcome. I always tell my clients: don’t let dietary restrictions stress you out. Honestly, some of my favorite crowd-pleasers are naturally safe. Think of a big board of sliced cheeses, grapes, and olives, or even some colorful veggie sticks with homemade hummus. They’re easy, gluten-free, and nut-free, and they look gorgeous on a table without any extra effort.

Can I prep these bites ahead of time, or will they all get soggy if I don't serve them right away?

Oh, I hear you! The last thing you want is to spend your whole party hovering over a tray of soggy crackers. Most of these are actually designed for prep. I usually assemble my dips and cheese boards a few hours early, but I keep the crunchy bits in a separate bowl until guests arrive. For the cooked items, just prep the components ahead of time and do a quick reheat right before the first doorbell rings!

Meaningful retirement party details on display.

Elements of a Meaningful Retirement Party

I remember one of my first big catering gigs—a massive, stuffy retirement bash where the client had spent a small fortune on towering floral arrangements that practically blocked everyone’s view of the guest of honor. People were standing around awkwardly, nursing lukewarm champagne, because the “perfect” retirement party details were all about the aesthetic and none of them were about the actual human beings in the room. It was a beautiful, expensive disaster, and honestly? It broke my heart a little. We get so caught up in the pressure of making everything look like a Pinterest board that we forget these milestones are supposed to be about celebrating a lifetime of hard work, not just a fancy centerpiece.

I’m not here to tell you how to hire a professional coordinator or where to source gold-leafed napkins. Instead, I want to share my real-world approach to pulling this off without losing your mind or your savings. We’re going to focus on the small, meaningful things—the kind of retirement party details that actually matter, like cozy lighting, easy-to-eat food, and creating a space where people can actually talk to one another. Let’s make this celebration feel like home.

Table of Contents

Simple Retirement Party Decorations That Spark Real Warmth

Simple Retirement Party Decorations That Spark Real Warmth

When it comes to choosing your retirement party decorations, I always tell my clients to lean into what feels nostalgic rather than what looks “professional.” Instead of ordering a bunch of shiny, generic streamers that’ll just end up in a bin next week, I love using things that actually tell a story. Think about pulling some vintage brass candlesticks from your thrift finds or scattering a few well-loved books around the snack table. If you’re looking for retirement party theme ideas that don’t feel forced, try something like “The Great Escape” with cozy textures and soft linens, or even just a “Golden Years” vibe using warm, amber-toned glassware.

The real secret to warmth, though, is all in the lighting. Please, for the love of all things cozy, turn off those harsh overhead lights! I’m a huge fan of string lights or even just a handful of unscented tea lights tucked into mismatched glass votives. It creates this soft, forgiving glow that makes everyone feel instantly relaxed. When the lighting is low and the atmosphere feels intimate, people actually want to linger and talk, which is exactly what a celebration like this should be about.

Choosing a Celebration Venue Selection That Feels Like Home

Choosing a Celebration Venue Selection That Feels Like Home.

Now, let’s talk about the big question: where are we actually doing this? When it comes to celebration venue selection, I always tell my clients to ignore the intimidating ballroom brochures. While a grand hall might look stunning in a photo, they can often feel a bit cold and stiff—the exact opposite of what a retirement should be about. If you’re looking to honor someone who has spent decades working hard, they probably just want to feel truly relaxed.

If your budget is tight or you just want that intimate vibe, your own backyard or a cozy living room is a goldmine. There is something so much more meaningful about hosting in a space where people can actually kick off their shoes. If you do decide to book a local cafe or a community garden, just make sure the layout allows for easy movement. You want a space that supports your retirement party theme ideas without feeling like you’re trapped in a formal banquet hall. Ultimately, pick a spot where the guest of honor can actually hear the stories being told around them.

Five little things that make a huge difference

  • Don’t overthink the menu—focus on “grazing” foods. Instead of a formal sit-down dinner that keeps everyone glued to their chairs, I love setting out big platters of easy-to-eat bites. It keeps the energy flowing and lets people move around the room to chat with different folks.
  • Curate a “memory lane” corner. You don’t need a high-tech slideshow; just grab some of those old physical photo albums or print out a few candid shots and scatter them on a side table. It’s such a lovely way to spark those “remember when” conversations that make these parties so special.
  • Set the mood with low-key lighting. This is my golden rule! Avoid those harsh overhead lights at all costs. A few well-placed floor lamps, some unscented tea lights, or even a string of warm fairy lights will instantly make the space feel cozy and relaxed rather than like a corporate office.
  • Keep the “official” speeches short and sweet. We all love a heartfelt tribute, but nobody wants to sit through a forty-minute presentation. Aim for a couple of meaningful toasts that leave everyone feeling inspired, then get back to the music and the laughter.
  • Create a way to say goodbye without the awkwardness. I’m a big fan of a simple guest book or even just a jar with slips of paper where people can write down their favorite memory of the retiree. It gives them something tangible to take home and cherish once the party winds down.

A few things to keep in mind

Focus on the vibe, not the budget—warm lighting and comfortable seating matter way more than expensive floral arrangements.

Pick a space where people can actually hear each other talk, whether that’s your own cozy living room or a local spot that feels lived-in.

Keep the “program” loose so the guest of honor can actually spend time catching up with everyone instead of being stuck in a formal itinerary.

The secret to a meaningful send-off

At the end of the day, your guests won’t remember if the napkins matched the tablecloth perfectly; they’ll remember the way the room felt, the warmth of the lighting, and how easy it was to actually sit down and share a laugh with the guest of honor.

Saoirse Mullan

The Heart of the Celebration

The Heart of the Celebration: cozy atmosphere.

At the end of the day, planning a retirement party isn’t about checking off a massive list of expensive decor or finding the most prestigious ballroom in the city. It’s really about those little, thoughtful details we’ve talked about—the soft lighting that makes everyone feel relaxed, a venue that doesn’t feel intimidating, and decorations that actually tell a story about the person we’re honoring. When you focus on creating a comfortable atmosphere rather than a perfect showroom, you allow your guests to actually breathe and enjoy themselves. Remember, it’s the combination of a cozy setting and meaningful touches that turns a standard gathering into a truly memorable milestone.

As you start pulling everything together, try not to let the stress of perfection get in the way of the fun. If a centerpiece isn’t exactly symmetrical or if you end up serving takeout instead of a five-course meal, don’t sweat it! Your friends and family aren’t there to critique your styling; they are there to celebrate a lifetime of hard work and the exciting new chapter ahead. Just keep the mood light, keep the drinks flowing, and focus on the genuine connections happening around the table. That is where the real magic happens, and honestly, that’s the best gift you can give to someone entering retirement.

Frequently Asked Questions

How can I handle the food without getting stuck in the kitchen the whole time?

Honestly, the kitchen is the biggest party-killer. If you’re stuck flipping burgers or plating salads, you’re missing the actual magic! My best advice? Go for a “build-your-own” station—think a taco bar or a fancy baked potato spread. It’s interactive, easy on your budget, and most importantly, it’s self-serve. That way, you can actually grab a drink, mingle, and enjoy the company instead of playing waiter all night.

Should I go with a big formal dinner or something more laid-back like a cocktail hour?

Honestly? Go with the cocktail hour. I’ve seen so many formal dinners where people feel stiff, checking their watches and struggling with heavy plates. A laid-back cocktail hour—think grazing boards, good music, and easy movement—lets people actually mingle and share stories about the retiree. It’s much more “them” and way less stressful for you as the host. Plus, it keeps the focus on the conversation, not the seating chart.

What's the best way to collect photos or memories from guests without it feeling cheesy?

Honestly, the “memory jar” can feel a little bit like a high school yearbook if you aren’t careful. Instead, I love setting up a dedicated “nostalgia station” with a few vintage polaroid cameras and some blank cards. It feels more like an activity than a chore. Or, even easier? Just create a shared digital album via a QR code on the tables. It’s low-pressure, totally seamless, and you actually get to keep all those candid, messy moments forever.

Fun gaming gifts for gamers.

Fun Gaming Gift Ideas for Gamers

I’ll be the first to admit that my usual world involves linen napkins, vintage bud vases, and trying to get fairy lights to stay exactly where I want them. But lately, I’ve realized that whether you’re hosting a candlelit dinner or a late-night session on the couch, the spirit of connection is exactly the same. Finding the right gaming gifts can feel a bit overwhelming if you aren’t part of that world, and I know how much it sucks to feel like you’re just throwing money at a box without actually knowing if the person will love it. You want to give something that feels thoughtful, not just something that happened to be on sale at the electronics store.

In this list, I’ve pulled together five ideas that I think strike that perfect balance between practical and genuinely special. We aren’t looking for the most expensive, flashy gadgets that will sit in a drawer; instead, I’m focusing on things that actually enhance the experience of playing. From cozy comforts to small upgrades that make a huge difference, these picks are all about making your favorite gamer feel truly seen. Let’s dive in!

Table of Contents

Cozy Up Their Setup with a Weighted Blanket

Cozy Up Their Setup with a Weighted Blanket

You know how when I’m working late on a big event proposal, I just want to wrap myself in something soft and feel totally grounded? I think gaming is exactly the same way. It can be intense, and sometimes you just need to sink into something cozy while you’re grinding through a long campaign. A high-quality weighted blanket is such a thoughtful way to say, “I hope you get some actual rest after that boss fight.”

The Ultimate "Don't Forget to Eat" Snack Basket

The Ultimate "Don't Forget to Eat" Snack Basket

One thing I learned from years in catering is that nobody has a good time when they’re hangry. If your gamer friend is the type to lose track of time and skip meals because they’re too focused on the screen, a curated snack basket is going to be their absolute hero. Forget the generic grocery store stuff; I’m talking about a mix of high-end jerky, some really good sea salt popcorn, and maybe even those fancy dried mango slices I’m always hoarding.

Aesthetic Lighting to Set the Mood

Aesthetic lighting to set the mood.

In my line of work, lighting is everything. It’s the difference between a room that feels sterile and one that feels magical. The same goes for a gaming setup! Instead of those harsh, blinding overhead lights, a set of smart LED strips or a soft, warm sunset lamp can completely transform the vibe of their space. It makes the whole experience feel more immersive and, frankly, a lot more relaxing for the eyes.

A Really Good Insulated Tumbler

There is nothing more tragic than getting halfway through an epic session only to realize your drink has gone lukewarm. I’m a bit of a creature of habit with my coffee, so I totally get the need for a reliable vessel. A heavy-duty, insulated tumbler is such a practical gift because it actually serves a purpose every single day, whether they’re sipping iced tea or a hot cocoa.

Retro-Inspired Decor for a Touch of Nostalgia

I have a massive weakness for vintage finds, and I think there’s something so charming about bringing a little bit of the past into a modern setup. Think about a small, framed print of an old-school game map or even a tiny, stylized figurine from a classic series. It adds so much character and soul to a space that can otherwise feel a bit too “techy” and cold.

A little more heart, a little less stress

Don’t get caught up in the hype or the most expensive tech; the best gifts are the ones that show you’ve actually been listening to what they love playing.

You don’t need a massive budget to be the “good gift giver”—sometimes a thoughtful, niche accessory is way more meaningful than a flashy, generic gadget.

At the end of the day, it’s about the fun they’ll have with the gift, so focus on what will actually get them excited to sit down and play.

The Heart of the Gift

At the end of the day, the best gaming gift isn’t the flashiest piece of tech on the shelf; it’s the thing that says, ‘I see you, I know what you love, and I can’t wait to hear about your next big win.’

Saoirse Mullan

Wrapping It All Up

At the end of the day, whether you’re picking out a cozy new headset, a specialized controller, or even just some fun themed snacks to keep the energy up, the goal is the same: making sure your person feels seen. You don’t need to spend a fortune on the latest high-end tech to make an impression. It’s really about those little details that show you actually listen when they talk about their favorite quests or their latest high scores. Just focus on finding something that fits their specific vibe, and you’ll be golden.

I always tell my clients when I’m styling an event that the most important ingredient isn’t the expensive linens or the fancy floral arrangements—it’s the heart behind the effort. Gift-giving for gamers is exactly the same way. It doesn’t have to be perfect or professional; it just has to be thoughtful. So, don’t overthink it or stress about getting the most expensive gadget on the market. Just grab something that sparks a bit of joy and lets them dive back into their favorite worlds. After all, the best gifts are the ones that help us connect and play.

Frequently Asked Questions

I'm on a super tight budget, so are there any cute little things I can grab that don't feel like an afterthought?

Oh, I hear you! Honestly, some of my favorite finds come from the bargain bin. If you’re tight on cash, don’t sweat it—just lean into the “small but thoughtful” vibe. Grab a cute, patterned snack bowl from a thrift shop and fill it with their favorite candy, or even a cozy pair of socks paired with a handwritten note. It’s the little details that show you actually care, not the price tag.

How do I figure out what kind of games they actually play without sounding like a total stalker?

Honestly, I get it—you don’t want to come across as if you’ve been scrolling through their digital life at 2 a.m. The easiest way is to just play it cool. Ask something low-pressure like, “Have you played anything good lately?” or “I’m looking for something new to watch/play, any recommendations?” Most gamers love talking about what they’re into. It’s a natural conversation starter that doesn’t feel like an interrogation!

Do you think physical gifts are still better, or should I just go with a digital gift card and call it a day?

Honestly, it depends on the vibe, but I’m a sucker for something physical. A digital gift card is super practical—no one’s going to be mad about extra Steam credit—but there’s something so much more special about handing someone a wrapped box. It shows you actually sat down and thought about them. If you’re short on time, a gift card is fine, but if you want to make them feel truly seen, go for the physical gift!

Elegant dinner party menu planning layout.

Planning a Menu for a Dinner Party

I remember standing in the middle of a high-end catering kitchen during my early twenties, surrounded by sous-chefs frantically plating tiny, microscopic portions of foam and microgreens. The air was thick with stress, and honestly? The food was terrible. Everyone was so obsessed with the “perfect” dinner party menu that they forgot to actually taste anything, let alone enjoy the company. I realized then that we’ve been sold this lie that hosting has to be a high-stakes performance involving expensive ingredients and hours of frantic chopping just to impress people who are really just there for the gossip anyway.

I’m not here to give you a list of intimidating recipes that will leave you sweating over a stove while your guests sit awkwardly in the living room. Instead, I want to share how you can build a dinner party menu that actually works for real life. We’re going to focus on hearty, soulful dishes that can be prepped in advance, so you can actually sit down, pour a glass of wine, and be present with your favorite people.

Table of Contents

Easy Dinner Party Appetizers to Kickstart the Conversation

Easy Dinner Party Appetizers to Kickstart the Conversation

I’m a firm believer that the first twenty minutes of a gathering set the entire tone, so don’t stress yourself out with anything that requires a knife and fork. I love leaning into easy dinner party appetizers that people can just grab with their hands while they’re leaning against your kitchen counter or hovering near the drinks. A big, colorful board of local cheeses, some crusty sourdough from the bakery down the street, and a bowl of salted Marcona almonds is my absolute go-to. It feels intentional and lovely without you being stuck in the kitchen while everyone else is catching up.

If you’re looking for something a bit more substantial but still low-maintenance, I always suggest keeping some vegetarian dinner party options in the mix. A warm, whipped feta dip drizzled with honey and topped with fresh thyme is a total crowd-pleaser and feels much fancier than it actually is. It’s all about that balance of textures—something crunchy, something creamy, and something salty. Just remember, the goal is to keep the energy flowing so you can actually be present with your guests instead of worrying about whether the olives are perfectly arranged.

Seasonal Dinner Party Courses That Feel Like a Warm Hug

Seasonal Dinner Party Courses That Feel Like a Warm Hug

When it comes to building out your seasonal dinner party courses, I always tell my clients to lean into what’s actually growing in the market. There is something so grounding about a meal that mirrors the weather outside. If it’s autumn, don’t fight it—go heavy on the roasted root vegetables and maybe a creamy squash soup. If you’re hosting in the summer, keep it light with heirloom tomatoes and fresh basil. The goal isn’t to act like a Michelin-star chef; it’s to make your guests feel like they’re being truly looked after by serving flavors that feel right for the moment.

I also find that incorporating a few solid vegetarian dinner party options makes everyone feel included without making the meal feel “incomplete.” A big, colorful tray of roasted seasonal veggies with a zesty tahini drizzle can easily take center stage. When you focus on high-quality, seasonal ingredients, you don’t need to stress over complex techniques. Just keep things simple, rustic, and soul-warming, and I promise your friends will leave feeling more than just full—they’ll feel completely at home.

My Little Secrets for a Stress-Free Menu

  • Don’t try to learn a brand-new, complicated recipe the night of the party. Stick to what you know and love; your guests will feel much more relaxed if you aren’t sweating over a timer in the kitchen all night.
  • Prep as much as you possibly can the day before. I’m talking about chopping the veggies, making the sauces, and setting the table. The goal is to have the heavy lifting done so you can actually enjoy a glass of wine with your friends.
  • Always, always ask about dietary restrictions before you even start your grocery list. There is nothing worse than realizing mid-meal that your best friend can’t eat the main course because of an allergy or a lifestyle choice.
  • Choose dishes that can sit in the oven or on the stove for a bit. Avoid anything that requires you to be “plating” every single dish at the exact second it’s ready. A big, beautiful family-style platter is way more inviting than individual tiny portions.
  • Keep the drink situation simple. You don’t need a full cocktail bar; a nice bottle of red, some chilled bubbly, and maybe a big pitcher of infused water is more than enough to keep the vibes flowing.

My Golden Rules for a Stress-Free Table

Prioritize crowd-pleasing comfort over complicated techniques; if you’re stuck in the kitchen all night, you aren’t actually hosting.

Build your menu around ingredients that are in season, because they naturally taste better and feel more intentional.

Keep the prep work manageable so you can actually sit down, grab a glass of wine, and enjoy the company of your guests.

The Heart of the Table

“At the end of the day, your guests won’t remember if the sauce was perfectly emulsified or if the garnish was symmetrical; they’ll remember how full they felt and how easy it was to just sit back and be themselves.”

Saoirse Mullan

Bringing It All Together

Bringing It All Together for dinner parties.

At the end of the day, building your perfect dinner party menu doesn’t have to be a stressful math equation of ingredients and timing. We’ve talked about starting things off with light, easy appetizers that let people graze while they catch up, and moving into those soulful, seasonal courses that really make a house feel like a home. Whether you’re serving up a rustic stew or a bright, citrusy pasta, the goal is to choose dishes that allow you to actually be present at the table rather than being stuck in the kitchen scrubbing pans. Remember, a menu that flows naturally is much better than one that is technically perfect but leaves the host feeling completely frazzled.

If you find yourself worrying about whether the seasoning is just right or if the plating looks a bit messy, take a deep breath and let it go. Your friends aren’t coming over to critique your culinary skills; they are coming to spend time with you. The most beautiful thing you can bring to the table isn’t a gourmet dish or a centerpiece from a high-end florist—it’s your warmth and genuine connection. So, light some candles, pour a little extra wine, and just enjoy the magic of having your favorite people in one room. You’ve totally got this!

Frequently Asked Questions

How do I handle guests with dietary restrictions without making them feel like an afterthought?

Honestly, the best way to handle this is to bake it into the entire menu from the start. Instead of making a “special” separate plate that looks lonely on the table, try to make your base dishes naturally inclusive—like a big, colorful roasted vegetable medley or a hearty grain bowl. If you lean into dishes that are naturally gluten-free or vegetarian, nobody feels like the “problem guest,” and everyone gets to eat the same delicious food.

Is it better to serve everything family-style or plate the dishes in the kitchen?

Honestly, if you want that cozy, “stay a little longer” vibe, go with family-style. There’s something so magic about passing a big bowl of pasta around; it breaks the ice and gets people interacting immediately. Plating in the kitchen can feel a bit stiff, like you’re at a formal restaurant. Unless you’re running super low on table space, let the food be part of the connection. Just keep the portions manageable!

How much of the menu can I actually prep the day before so I'm not stuck in the kitchen all night?

Honestly, I’m a huge believer in doing as much as possible ahead of time. I usually aim to have about 70% of the heavy lifting done the day before. Chop your veggies, make your sauces, or even bake your dessert. If you can prep it and tuck it in the fridge, do it! The goal is to be holding a glass of wine with your guests, not staring at a pile of unpeeled potatoes.

Simple and fun toddler party games.

Simple Party Games for Toddlers

Let’s be real for a second: planning a birthday for a tiny human can feel a little bit like trying to herd cats, only the cats are wearing party hats and occasionally having meltdowns. I remember my first time hosting a little one’s birthday; I was so worried about the perfect balloon arch that I completely forgot that toddlers don’t actually care about aesthetics. They just want to move. If you find yourself spiraling about how to keep a room full of energetic two-year-olds from total chaos, please take a deep breath. Finding the right toddler party games isn’t about high-production value or expensive rentals; it’s really just about finding simple ways to channel all that adorable, frantic energy so you can actually sit down and enjoy a lukewarm cup of coffee.

In this post, I’m sharing my five absolute favorite, low-stress ideas that work every single time. I’ve narrowed these down to activities that are actually doable without needing a professional entertainer or a massive budget. We’re going to skip the complicated rules and focus on games that keep the little ones entertained while helping you stay sane.

Table of Contents

Bubbles, Bubbles Everywhere

Toddler catching Bubbles, Bubbles Everywhere.

Honestly, if you want to be the hero of the afternoon without breaking a sweat, just grab a few different types of bubble wands. It sounds almost too simple, but there is something about watching a toddler try to catch a floating bubble that just makes everyone smile. You don’t need a high-tech bubble machine; even a few hand-held bottles from the dollar store will do the trick perfectly.

The Classic Musical Freeze

Children playing The Classic Musical Freeze.

We all grew up with musical chairs, but let’s be real—trying to make toddlers fight over a single chair is a recipe for tears. Instead, I like to play a much gentler version where we just dance like crazy whenever the music is playing. When the music stops, everyone just has to freeze in whatever silly position they’re in.

A Treasure Hunt in a Sensory Bin

A Treasure Hunt in a Sensory Bin.

If you have a group that tends to get a bit hyper, I highly recommend setting up a little sensory station. You can take a large plastic tub, fill it with something safe like dried pasta or even just some colorful pom-poms, and hide a few tiny plastic animals inside. It gives the kids something tactile to focus on, which is so grounding for them.

Parachute Play (The DIY Version)

You don’t need to order a professional silk parachute to get this effect. Grab a large, colorful bedsheet from your linen closet and gather a few kids around the edges. Having everyone hold onto the fabric and shake it like crazy to make “waves” is an absolute riot for this age group.

Sticky Note Scavenger Hunt

This is one of my favorite “emergency” games because it requires almost zero setup. Just grab a pack of bright sticky notes and write a few simple shapes or colors on them, or even just different colored ones. Hide them around the living room at toddler eye level—don’t put them too high, or they’ll just end up frustrated!

My Best Advice for Keeping it Stress-Free

Don’t get caught up in the “perfect” itinerary; if the kids are happy playing with some bubbles or a few blocks, let them be.

Keep the activities short and sweet to avoid those inevitable toddler meltdowns when they get overstimulated.

Focus on creating a cozy space where the little ones can roam safely, so you can actually sit down and enjoy a conversation with the other parents.

My Golden Rule for Toddler Parties

At the end of the day, those little ones don’t need a structured itinerary or a mountain of expensive props to have a good time; they just need a bit of space to move and a few simple things to explore while you actually get a chance to breathe and talk to the other parents.

Saoirse Mullan

Take a Deep Breath, You've Got This

At the end of the day, whether you’re setting up a bubble station, organizing a little scavenger hunt, or just letting them run wild with some music, the goal is the same. You don’t need a structured itinerary or a room full of expensive, specialized equipment to keep the energy up. Just remember that the best games for toddlers are the ones that are low-pressure and high-movement. By keeping things simple—focusing on things like sensory play or basic group activities—you’re ensuring that the kids stay entertained without you having to play “referee” every five minutes.

I know how overwhelming it can feel when you’re staring at a house full of tiny humans and a mounting to-do list, but please try to be kind to yourself. Your toddler won’t remember if the games were perfectly executed or if the activity lasted exactly twenty minutes; they’re going to remember the feeling of being celebrated and the joy of playing alongside their favorite people. So, grab a drink, find a cozy corner, and just soak in the chaos. You aren’t just hosting a party; you’re making magic in your own living room, and that is more than enough.

Frequently Asked Questions

How do I handle it if one of the kids gets overwhelmed or has a meltdown during the games?

Honestly, take a deep breath—it happens to the best of us. If a little one hits their limit, don’t sweat it. I always suggest setting up a “quiet corner” with some soft pillows and maybe a few books away from the main chaos. If they need to step away, let them. It’s much better to let them reset in peace than to force them to keep playing. The party will keep going!

Do I actually need to have prizes for every single game, or is that just too much stress?

Honestly? Please, don’t do that to yourself. If you start worrying about little plastic trinkets for every single round, you’ll spend the whole party hovering over the prize basket instead of actually enjoying your friends. It can definitely feel a bit much. Instead, maybe just have one “grand prize” at the end, or better yet, just make the game itself the fun part. Let’s keep it low-stress, okay?

What’s the best way to transition from active playtime to sitting down for food without it turning into chaos?

Honestly, the “transition chaos” is where most parties start to unravel! My trick is to never just announce “food is ready”—that’s a recipe for a meltdown. Instead, I like to use a “bridge activity.” I’ll dim the lights slightly or put on some much calmer, slower music to signal the energy shift. I also love doing a quick, seated “mystery box” game or a short storytime right at the table. It draws them in naturally before the plates even hit the table.

Creative craft gifts for hobbyists.

Creative Craft Gift Ideas for Hobbyists

Honestly, I am so over the idea that you need to spend a fortune or have a degree in fine arts to give something meaningful. Every time I scroll through social media, I see these incredibly complex, high-end DIY tutorials that look more like a stressful chore than a labor of love. It makes me feel like if I’m not spending ten hours on a single candle, my craft gifts aren’t “good enough.” But let’s be real: most people don’t have the time, and frankly, we don’t need the pressure. A gift shouldn’t feel like a performance; it should feel like a hug in physical form.

I’m not here to give you a list of projects that require a professional workshop and a massive budget. Instead, I want to share the kind of low-stress, soulful ideas I actually use when I’m styling a cozy gathering or celebrating a friend. We’re going to focus on thoughtful, doable projects that highlight the person receiving them rather than how much work you put in. I promise to keep things practical, budget-friendly, and—most importantly—actually fun to make.

Table of Contents

Thoughtful Homemade Presents That Truly Mean Something

Thoughtful Homemade Presents That Truly Mean Something

Honestly, I think the best kind of present is the one that shows you actually listened when your friend mentioned they loved a specific scent or a certain color. You don’t need to be some master artisan to pull this off. For me, some of my favorite thoughtful homemade presents involve simple things like hand-poured soy candles in those vintage glass jars I’m always hunting for at thrift stores. It’s not about perfection; it’s about the fact that you sat down and made something specifically for them.

If you’re feeling a bit nervous about your skills, don’t let that stop you. There are so many creative gift making for beginners that feel incredibly high-end without requiring a workshop full of tools. Think about a beautifully curated herb garden in a ceramic pot or even a custom spice blend in a pretty glass vial. These are such budget friendly diy gifts that still feel deeply intentional. When you give something handmade, you’re giving a little piece of your time and energy, and trust me, that’s what people actually remember when the party is over.

Creative Gift Making for Beginners and Busy Friends

Creative Gift Making for Beginners and Busy Friends

If you’re feeling a bit overwhelmed or your calendar is looking a little too full, please don’t stress. You don’t need to be a master artisan to make something beautiful. I always tell my clients that creative gift making for beginners is really just about the intention behind the item. For those of us with zero free time, I love leaning into simple, elevated basics. Think about a high-quality linen tea towel paired with a nice jar of local honey, or even a beautifully curated “movie night” basket. These are budget friendly diy gifts that look intentional rather than rushed, and they don’t require hours of sitting at a craft table.

When you do have a spare hour, I highly recommend keeping a small stash of crafting supplies for gifting tucked away in a drawer—things like high-quality twine, some dried eucalyptus, or even just some nice textured paper. Having these on hand makes it so easy to turn a simple store-bought item into a personalized craft project in seconds. It’s those tiny, tactile details that make a person feel like you truly put thought into their specific taste.

My Little Secrets for Crafting Gifts That Actually Get Used

  • Keep it personal, not perfect. I’ve learned that a slightly wonky hand-painted mug feels way more special than something factory-made. Don’t stress about making it look like a Pinterest pro did it; the charm is in the “I made this for you” factor.
  • Think about their daily rituals. If your best friend lives for her morning coffee, don’t just make a random coaster—make a set of beautiful ceramic ones that she’ll actually reach for every single morning.
  • Don’t go overboard on the supplies. You don’t need a massive craft haul to make something lovely. Sometimes a single spool of high-quality linen ribbon or a beautiful piece of vintage paper from one of my thrift finds is all you need to elevate a simple handmade gift.
  • Focus on the “sensory” stuff. I’m a huge fan of things that smell or feel good—think hand-poured soy candles or a simple botanical bath soak. It turns a little gift into a whole mood, which is exactly what I aim for with my event styling.
  • Use what you already have. Before you run out to the craft store, raid your own stash or look through your vintage collection. Repurposing a beautiful old glass jar into a lovely candle holder is much more sustainable (and much more “me”) than buying something brand new.

A Few Final Thoughts Before You Get Crafting

Don’t let perfectionism get in the way of the fun; your friends are going to love the effort you put in, even if a little glue ends up on the table.

Focus on the personal details that show you’ve been listening—a handmade gift that references an inside joke is worth more than anything bought from a big-box store.

Keep your supplies simple and your heart in it; you don’t need a studio full of expensive tools to create something that feels special and sincere.

The Heart Behind the Handiwork

“At the end of the day, people don’t remember the price tag on a gift; they remember the fact that you sat down, took a breath, and spent your time making something just for them. That’s where the real magic happens.”

Saoirse Mullan

Bringing It All Home

Handmade gifts Bringing It All Home.

At the end of the day, whether you’re tackling a complex DIY project or just putting together a simple, curated little basket of treats, the goal is the same. We’ve talked about everything from those deep, meaningful homemade treasures to the quick-and-easy wins for when life gets a bit too hectic. You don’t need to be a master artisan or have a dedicated studio space to pull this off. Just remember that the best gifts aren’t the ones that look like they came straight out of a high-end boutique catalog; they are the ones that show you actually took a moment to think about the person receiving them. A little bit of effort and a lot of heart will always beat a generic store-bought item.

If you’re feeling a bit intimidated, just take a deep breath and start small. Grab some twine, some pretty paper, or even just a handwritten note to tie it all together. My biggest piece of advice? Don’t aim for perfection. If a knot is a little messy or the colors aren’t exactly “on trend,” it just adds to the charm of something handmade. People want to feel your warmth and your intention, not see a flawless manufacturing process. So, go ahead and get a little messy with it—your friends are going to love it because it came from you.

Frequently Asked Questions

I’m a total beginner—what are some basic supplies I should keep on hand so I don't have to run to the craft store every five minutes?

Honestly, I’ve been there—nothing kills the creative flow like realizing you’re missing one tiny thing and having to trek back to the craft store. To keep things easy, I always keep a “maker’s kit” in my studio. Grab some decent quality twine, a variety of cardstock, sharping scissors, a glue gun (the reliable kind!), and a good roll of double-sided tape—trust me, you’ll use it. Having those basics on hand makes everything feel so much more relaxed.

How do I make sure my handmade gifts look "intentional" and polished rather than just looking like a rushed DIY project?

The secret is all in the finishing touches. I always say, it’s not about being perfect; it’s about looking like you actually took your time. Swap out that messy twine for a nice velvet ribbon, or tuck a sprig of dried lavender into the packaging. Even a handwritten note on heavy cardstock makes a huge difference. It’s those tiny, deliberate details that turn a “quick craft” into something that feels truly special.

If I'm on a super tight budget, are there ways to upcycle things I already have around the house into something actually beautiful?

Oh, absolutely! Honestly, some of my favorite pieces come from digging through my own cupboards. Grab those old glass jars from your pasta sauce—clean them up, maybe tie some twine around the rim, and suddenly they’re gorgeous candle holders. Or, if you have some leftover fabric scraps, wrap them around plain wooden coasters. It’s all about seeing the potential in the “junk.” It adds so much more soul than something store-bought!

Sophisticated garden party decor styling.

Styling a Sophisticated Garden Party

I was once scrolling through Pinterest at 2:00 AM, staring at these incredibly staged, million-dollar outdoor setups that looked more like a movie set than a place where actual humans could sit and eat. Honestly, it made me want to throw my phone across the room. There is this huge, exhausting myth that you need a professional florist and a massive budget to nail your garden party decor, but that’s just not true. If you spend your whole afternoon worrying about whether your linen napkins perfectly match the hydrangea petals, you’re going to be too stressed to actually enjoy your own party.

I’m here to tell you that we are doing things differently. I’m going to share my favorite, low-stress ways to style your outdoor space using what you already have (or can find for a few euros at a thrift shop). We’re going to focus on warm lighting, cozy textures, and simple touches that make your guests feel instantly at home. My goal isn’t to help you host a perfect photoshoot; it’s to help you create a beautiful, lived-in atmosphere where the conversation flows as easily as the wine.

Table of Contents

Creating a Whimsical Garden Party Setup Without the Stress

Creating a Whimsical Garden Party Setup Without the Stress

The secret to a successful setup is to stop trying to make everything look like a Pinterest board and start thinking about how it actually feels. I always tell my clients to start with the foundation: comfort. Instead of renting stiff, formal chairs, why not throw down some weather-resistant rugs and a handful of mismatched floor cushions? It instantly creates that boho chic garden decorations vibe that encourages people to actually sink in and stay a while.

When it comes to the table, don’t feel like you need to buy a matching set of linens. I love using a simple linen runner and layering in some of my favorite thrifted glassware to add texture. For a truly whimsical garden party setup, focus on the height. Use old wooden crates or even sturdy books to create different levels for your platters. This keeps the conversation flowing naturally because the food is easy to reach, and it looks intentional rather than cluttered. Just remember, if a centerpiece is so tall that guests can’t see each other, it’s doing more harm than good!

Fairy Light Garden Ambiance for Warm Real Connection

Fairy Light Garden Ambiance for Warm Real Connection

If there is one thing I’ve learned from years of styling events, it’s that harsh overhead lighting is the quickest way to kill a good mood. When the sun goes down, you want to transition into that soft, glowy stage where everyone feels a little more relaxed and a lot more talkative. For me, nothing beats a fairy light garden ambiance to create that instant sense of intimacy. You don’t need to go overboard with professional rigs; just draping some simple warm-toned string lights through the branches of a tree or along a fence does wonders.

I’m a huge fan of layering different light sources to keep things feeling organic rather than staged. Think about mixing those delicate fairy lights with a few scattered lanterns or even some mismatched thrifted candles on the tables. It adds to that effortless boho chic vibe we’re all chasing. The goal isn’t to light up the entire yard like a stadium, but to create little pockets of warmth. When the light is low and soft, the distractions fade away, and you’re left with what actually matters: real, uninterrupted conversation.
My Go-To Secrets for a Space That Feels Like Home

  • Don’t overthink the table setting; I love using a mix of mismatched vintage plates from my latest thrift finds to give things a relaxed, lived-in feel.
  • Use old wooden crates or even just a few sturdy stools to create different levels for people to sit, which makes the whole garden feel much more cozy and less like a formal dining room.
  • Instead of expensive floral arrangements, grab some inexpensive herbs like rosemary or mint from the local market—they look lovely in small jars and smell incredible when guests lean in to chat.
  • Keep the pathways clear but add a little magic by tucking a few battery-operated tea lights into lanterns or glass jars along the walk to the seating area.
  • If you’re worried about things blowing away in a breeze, keep a roll of double-sided tape (my absolute lifesaver!) handy to secure napkins or lightweight decor to the table.

My Top Tips for a Stress-Free Garden Soiree

Prioritize lighting over expensive props; a few strings of warm lights do more for the mood than a dozen pricey centerpieces.

Keep the decor “lived-in” and cozy rather than perfect, so your guests feel comfortable enough to actually relax and stay a while.

Focus your energy on the things that spark conversation, like easy-to-grab snacks and a comfortable seating layout, rather than getting caught up in tiny details.

## My Philosophy on Party Styling

“At the end of the night, your guests won’t remember if your floral arrangements were perfectly symmetrical or if you used expensive linen napkins; they’ll remember how the warm light made them feel and how easy it was to just sit down, grab a drink, and actually talk to one another.”

Saoirse Mullan

Bringing It All Home

Cozy garden decor, Bringing It All Home.

At the end of the day, decorating your garden shouldn’t feel like another item on a never-ending to-do list. Whether you’re stringing up those soft fairy lights to create a glow or hunting down some perfectly imperfect vintage glassware from a local thrift shop, the goal is the same: setting the stage for a good time. You don’t need a massive budget or a professional styling crew to make your backyard feel magical. Just focus on the basics—comfortable seating, a bit of warm lighting, and maybe a few scattered wildflowers—and you’ll have a space that feels effortlessly inviting rather than stiff and staged.

If I’ve learned anything from years of styling events, it’s that your guests won’t remember if your centerpieces were perfectly symmetrical or if you used the most expensive linens. What they will remember is the way the evening felt, the laughter shared over a shared plate of food, and the way they felt truly welcomed in your home. So, take a deep breath, grab that roll of double-sided tape from your purse, and just let things be a little messy. The best memories happen in the spaces where everyone feels comfortable enough to actually sit down and stay a while.

Frequently Asked Questions

What should I do if my garden is actually pretty small or a bit messy?

Honestly, don’t let a tiny or messy yard stop you! I’ve worked in some seriously cramped spaces. If your garden is small, lean into it—think “intimate bistro vibes” rather than “cramped.” Use a few cozy floor cushions or a small bistro set to create a focal point. As for the mess? Just embrace the wild look! A bit of untamed greenery actually adds to that effortless bohemian charm we love. Focus on the seating and the lighting, and your guests won’t even notice the weeds.

How can I keep my table settings from blowing away if it gets a little breezy?

Oh, the dreaded garden breeze! I’ve definitely had a napkin fly into a guest’s drink before—not exactly the “magical” vibe I was going for. Honestly, my best trick is using weightier, vintage glassware; those heavy crystal coupes I thrift are perfect for holding down menus. You can also tuck a pretty stone or a small decorative object under your napkins. Just keep it simple and functional so you can get back to the conversation!

Are there any affordable ways to add color without buying a ton of new stuff?

Honestly, don’t go out and buy a bunch of new plastic decor—it usually ends up looking a bit tacky anyway. My favorite trick is to raid your own linen closet! Grab some colorful tea towels or even old scarves to drape over chairs or use as napkins. I also love using mismatched vintage glassware from my thrift finds; even just a few bright amber or blue glasses on a table can make the whole setup pop.

Large gourmet grazing table design layout.

How to Design a Large Grazing Table

I still remember one of my first big catering gigs back in the city; I spent six hours meticulously arranging tiny sprigs of rosemary and expensive microgreens on a massive, expensive slate board, only to watch a guest accidentally knock a glass of red wine right into the center of it. It was a total disaster, and honestly? Most of the guests barely even noticed the “artistry”—they just wanted something delicious to munch on while they actually talked to each other. We’ve been sold this idea that a grazing table has to be some high-stress, Pinterest-perfect masterpiece that costs a fortune in specialty ingredients, but I think that’s a total waste of your energy.

I’m not here to teach you how to build a museum exhibit on a wooden board; I want to help you build a spread that actually works for your life. In this post, I’m sharing my real-world, no-nonsense approach to pulling together a grazing table that feels abundant and cozy without the total meltdown. We’re going to focus on the good stuff—reliable cheeses, hearty breads, and plenty of variety—so you can spend less time fussing over placement and more time enjoying your friends.

Table of Contents

Artisan Cheese and Meat Selection for Real Connection

Artisan Cheese and Meat Selection for Real Connection

When it comes to your artisan cheese and meat selection, please don’t feel like you have to go out and buy the most expensive imported truffle brie just to impress anyone. In my experience, the best spreads are the ones that feel approachable. I love picking up a few reliable favorites from the local deli—maybe a sharp cheddar, a creamy goat cheese, and some salty prosciutto—and just letting them be the stars of the show. The goal isn’t to look like a professional chef; it’s to provide something delicious that people can nibble on while they’re actually talking to one another.

If you’re looking for some simple charcuterie board styling tips, my biggest secret is to avoid being too precious with the arrangement. You don’t need perfect symmetry. Instead, try grouping your meats in little ribbons and tucking small chunks of cheese into the gaps. I always keep a few extra crackers and some dried apricots nearby to fill in any awkward empty spots. It’s all about creating a lush, effortless look that invites your guests to reach in and dig in without feeling like they’re going to ruin a masterpiece.

Grazing Table Platter Components That Spark Conversation

Grazing Table Platter Components That Spark Conversation

Once you’ve got your cheeses and meats sorted, it’s time to fill in the gaps. I always say that the “empty spaces” are where the magic happens. Instead of just laying things out flat, think about adding different heights and textures. I love using small ramekins for olives or cornichons, and maybe a few little bowls of honey or spicy jam to keep things interesting. These little details are some of my favorite party food presentation ideas because they give people something to talk about—like, “Oh, you have to try this fig jam with the brie!”

Don’t be afraid to get a little messy with your fruits and nuts, either. I usually scatter some dried apricots, handfuls of Marcona almonds, and maybe a few clusters of grapes across the board to create a sense of abundance. When you’re looking at different grazing table platter components, remember that it shouldn’t look too perfect or manicured. You want it to look lush and inviting, like it just naturally tumbled onto the table. It’s that effortless, “help yourself” vibe that really makes guests feel at home.

My Little Secrets for a Stress-Free Spread

  • Don’t be afraid of height. I always keep a few sturdy wooden crates or even just some upside-down bowls tucked under my linens to create different levels; it makes the whole table look lush and intentional rather than just flat.
  • Keep the “messy” stuff contained. I like to use small, mismatched vintage bowls for things like olives, honey, or jams so you aren’t constantly worrying about a rogue drop of balsamic ruining your tablecloth.
  • Think about the “grab-and-go” factor. If you’re hosting a mingle-heavy party, make sure there are plenty of easy-to-pick-up items like grapes or crackers so people aren’t stuck hovering over a plate with a knife.
  • Lighting is everything. Instead of harsh overhead lights, I scatter a few tea lights or some battery-operated fairy lights around the edges of the food to give the whole spread a warm, inviting glow.
  • Leave some “breathing room.” You don’t need to cover every single square inch of the table; a little bit of empty space between clusters of food actually makes the spread look more curated and less overwhelming.

My Golden Rules for a Stress-Free Spread

Don’t sweat the perfect symmetry; a little bit of delicious chaos actually makes people feel more comfortable reaching in for a snack.

Focus on variety over volume—a few really good cheeses and some crunchy nuts are better than a mountain of mediocre crackers.

Always keep things easy to grab so your guests can keep a drink in one hand and a conversation going with the other.

My Philosophy on Food

“Don’t get caught up in trying to make a grazing table look like a museum exhibit; if people are too intimidated to touch the food, you’ve missed the point. I want my guests reaching for a piece of brie and a cracker while they’re mid-laugh, not staring at a perfectly placed sprig of rosemary.”

Saoirse Mullan

Bringing It All Together

Bringing It All Together with grazing tables.

At the end of the day, building your grazing table doesn’t have to be this stressful, high-stakes production. Just remember that it’s all about those simple, thoughtful layers: a handful of your favorite cheeses, some salty meats, plenty of crunchy textures, and maybe a few clusters of grapes or olives to fill in the gaps. You don’t need to hunt down rare, expensive delicacies to make an impact; honestly, a well-curated selection of things you actually enjoy eating is much better than a spread of fancy foods that no one touches. Focus on the variety, keep the layout a little bit messy and organic, and let the food do the heavy lifting so you can actually enjoy your own party.

I know it can feel overwhelming when you’re staring at a pile of crackers and cheese, but please don’t let the “perfect” look get in the way of the fun. My best advice? Just dive in and start arranging. If a piece of brie ends up slightly crooked or a grape rolls off the board, it’s no big deal—it just adds to that cozy, lived-in charm we’re all after. The most important ingredient isn’t something you can buy at a specialty market; it’s the warmth and hospitality you bring to the table. So, grab a glass of wine, light some candles, and get ready to make some wonderful memories with your favorite people.

Frequently Asked Questions

I don't have a massive dining table, so how can I make a grazing spread work in a smaller living room space?

Don’t sweat the small space! Honestly, a massive table is overrated anyway. If your dining area is tiny, just clear off your coffee table or even use a sturdy sideboard. I love using tiered cupcake stands or even a few wooden cutting boards at different heights; it creates visual interest without taking up much footprint. It makes the spread feel more intimate, like everyone is huddled close together, which is exactly the vibe we’re going for.

Is it better to prep everything the night before, or should I wait until right before the guests arrive so nothing looks wilted?

Oh, I feel this struggle! Honestly, I’m a big fan of a “hybrid” approach. I love prepping the non-perishables—like the nuts, dried fruits, and crackers—the night before so I’m not scrambling. But for the good stuff? Definitely wait. I’d never prep sliced meats or delicate berries too early; they just get sad and weep by party time. Aim to assemble the main spread about an hour before guests arrive so everything stays fresh and vibrant.

How do I keep the food looking fresh and appetizing if the party is going to last for a few hours?

Honestly, the biggest mistake is putting everything out at once. If you have a long afternoon or evening ahead, I always suggest “staggering” your spreads. Keep your main proteins and cheeses in the fridge and just bring out fresh, beautiful batches every hour or so. It keeps the colors looking bright and prevents that sad, wilted look. Plus, it gives you a little excuse to pop into the kitchen and refresh the vibe!

Expert baby shower coordination and planning.

Organizing a Thoughtful Baby Shower

I was once standing in the middle of a high-end hotel ballroom, staring at a mountain of $200 floral arrangements and custom-printed place cards, feeling completely disconnected from the actual celebration. The client was stressed about the exact shade of sage green for the napkins, while the mom-to-be looked like she just wanted to sit down and eat a sandwich. It hit me then that most people get baby shower coordination all wrong; they focus so much on the “Instagrammable” perfection that they forget to actually host anyone. We’ve been sold this idea that a shower needs to be a choreographed production, but honestly? That’s just a recipe for burnout.

I’m not here to give you a checklist of expensive things you don’t need. Instead, I want to share how you can handle the logistics of baby shower coordination without losing your mind or your entire savings account. I’ll show you how to prioritize real connection over fancy props, focusing on simple flow, cozy setups, and smart ways to keep things moving. We’re going to make sure the guest of honor feels celebrated, and more importantly, that you actually get to enjoy the party too.

Table of Contents

A Realistic Party Planning Timeline for Busy Friends

A Realistic Party Planning Timeline for Busy Friends

Look, I get it. You’re likely juggling a full-time job, a social life, and maybe a messy house, so the idea of a massive project feels overwhelming. The secret to keeping your sanity is breaking things down so you aren’t pulling an all-nighter the week before. I always tell my clients that a solid party planning timeline is your best friend; it turns a mountain of stress into a series of tiny, manageable hills. Start about six weeks out by nailing down your guest list and deciding on a vibe. This is also when you should start budgeting for baby celebrations so you don’t accidentally spend your entire grocery budget on gold-foiled napkins.

Once you have the basics set, aim to finalize your menu and any DIY elements about three weeks before the big day. If you’re feeling creative, this is the sweet spot to scout for some cute event decor ideas for baby showers—maybe some thrifted brass candlesticks or some dried florals. Try to have your shopping done a week in advance. That way, the final few days are just about the little things, like prepping food or setting out the cozy blankets, rather than frantic errands.

Budgeting for Baby Celebrations Without the Stress

Budgeting for Baby Celebrations Without the Stress

I know exactly how it feels when you open a spreadsheet and suddenly feel like you need a second mortgage just to host a brunch. It’s so easy to get caught up in the “Pinterest perfection” trap, but honestly? Budgeting for baby celebrations shouldn’t feel like a math exam you didn’t study for. My best advice is to pick your “big three.” Decide right now what matters most to you: is it the food, the atmosphere, or maybe a really cute cake? Once you nail those, everything else can be scaled back.

Instead of renting a massive hall, I’m a huge advocate for keeping things intimate at home or even a local park. This makes venue selection for baby showers much less intimidating and saves a massive chunk of your funds. If you find yourself running low on cash, don’t panic. Skip the expensive, single-use party favors and put that money toward better snacks or some lovely, mismatched vintage glassware from a thrift shop. It adds so much more character than a plastic goody bag ever could!

Five Ways to Keep the Vibe Cozy (and Your Sanity Intact)

  • Focus on the seating, not just the snacks. There’s nothing worse than a beautiful setup where half your guests are awkwardly perched on hard folding chairs. I always tell my clients to prioritize comfort—grab some extra floor cushions or pull in those cozy armchairs from the den so people can actually settle in and chat.
  • Let the lighting do the heavy lifting. Avoid those harsh overhead lights at all costs! If you want that instant “magical” feeling, lean into warm lamps, some string lights, or even just a few unscented tea lights scattered around. It makes the whole room feel softer and much more inviting.
  • Keep the games low-key. We’ve all been to those showers where you’re forced to play a game that feels a bit… much. Instead of high-pressure activities, try something gentle like a guest book where people can leave a little piece of advice, or just let the conversation flow naturally over some good food.
  • Create a “self-serve” station to save yourself the stress. Instead of trying to play waiter all afternoon, set up a cute little drink station or a grazing board where people can help themselves. It keeps things casual and lets you actually sit down and enjoy the moment with your friends.
  • Don’t be afraid to thrift your decor. You don’t need to buy a whole new set of things just for one afternoon. I love scouring local thrift shops for unique vintage platters or mismatched glassware—it adds so much character and keeps the budget in check, which is a huge win for everyone.

My Golden Rules for a Stress-Free Shower

Focus on the atmosphere over the aesthetics; dim lighting and comfy seating matter way more than matching everything to a specific color palette.

Keep the food simple and crowd-friendly so you aren’t stuck in the kitchen while everyone else is having a blast.

Prioritize meaningful moments and real conversation over a perfectly executed schedule—if things get a little messy, it just means people are actually having fun.

The Heart of the Celebration

“At the end of the day, nobody is going to remember if the floral arrangements were perfectly symmetrical or if you used the ‘expensive’ napkins; they’re going to remember how warm they felt sitting in your living room, surrounded by people who truly care.”

Saoirse Mullan

Bringing It All Together

Bringing It All Together for baby showers.

At the end of the day, coordinating a baby shower doesn’t have to feel like a second full-time job. We’ve walked through the timeline, figured out how to keep the budget from spiraling, and looked at how to make everything feel cohesive without breaking the bank. Just remember to keep your eyes on the prize: a relaxed atmosphere where the guest of honor can actually breathe and enjoy the love surrounding them. If you’ve got your snacks sorted, your lighting is dim and cozy, and you’ve got a little bit of double-sided tape in your purse for any last-minute decor mishaps, you are already ahead of the game.

Please, don’t let the pursuit of a “Pinterest-perfect” aesthetic rob you of the joy of the moment. If a centerpiece leans a little to the left or the cake arrives ten minutes late, I promise you, nobody is going to care. What your friends and family will remember is the laughter shared over a good drink and the warmth of being in a room filled with so much excitement for a new little life. Focus on the heart of the celebration—the people—and everything else will simply fall into place. You’ve got this!

Frequently Asked Questions

How do I handle the guest list if the parents-to-be have totally different vibes for their social circles?

Ugh, the “clashing circles” dilemma—I’ve seen this so many times! Honestly, don’t try to force one giant, cohesive group if it feels unnatural. My advice? Think of it as two mini-celebrations under one roof. You can use different zones in the room to give each group their own “vibe.” Maybe one corner has the rowdy college friends and another has the cozy family nook. It keeps the energy right for everyone.

What should I do if I'm hosting at home and I'm worried about the space feeling too cramped or cluttered?

Honestly, I’ve been there! When I’m styling in smaller living rooms, my first rule is: less is more. Instead of scattering tiny decor pieces everywhere, try grouping things. One gorgeous, chunky centerpiece on the coffee table is much better than five little ones cluttering the surface. Also, clear those surfaces! Move your daily mail or random knick-knacks into a basket in another room. It creates instant breathing room so your guests can actually move.

Are there any easy ways to keep the games from feeling cringey or forced?

Honestly, I totally get it. There is nothing worse than that awkward silence when a game feels forced. My rule of thumb? If it feels like a chore, scrap it. Instead of those cheesy trivia sheets, try something low-key like a “guess the baby food” tasting or just leave some cute prompts on the tables to spark conversation. Keep things optional and light—the goal is to laugh with your friends, not make them feel put on the spot.